Tag: roof cleaning

Protecting Your Roofing From the Elements

A roof is one of the most important parts of a house. It protects the home from rain, snow, sunlight, and extreme temperatures. A good roof can also increase a home’s value.

There are many types of roofs. Some have a flat surface, while others are steeply sloped. A sloping roof is usually designed to drain water. Contact Corpus Christi Roofing CO now!

Shingles are the stalwart guardians of your roof against the elements. But, even these hardy materials are not impervious to the insidious threat of rot. Shingles deteriorate when exposed to prolonged moisture, often caused by inadequate ventilation or the growth of algae and moss. These conditions create an ideal breeding ground for moisture, infiltrating the shingle’s layers and setting the stage for gradual but steady decay.

One of the most common problems with shingles is their failure to adhere to the roofing substrate. Poor adhesion can be due to manufacturing inconsistencies, improper installation, aging and deterioration, contamination of the adhesive with dirt or other substances, cyclic thermal expansion and contraction and a number of other factors.

Blistering is another common problem with shingles. When the granules that cover the asphalt in the shingle begin to wear off, it allows the UV rays from the sun to penetrate and degrade the underlying materials. When this happens, the shingles become brittle and more likely to be lifted by wind.

It is also important that you regularly inspect your shingles to ensure that the seams are fully sealed. A properly sealed shingle will not only prevent leaks, but will also help to extend the life of your roof.

Another issue that can impact the shingle’s performance is the pitch of your roof. A steep pitch can increase the amount of wind that passes over the shingle, leading to greater uplift and potential damage.

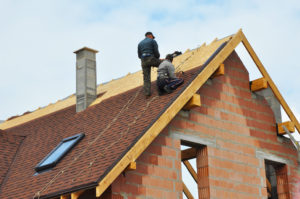
Some of these issues can be avoided by hiring a qualified and experienced contractor to install your shingle roof. You should look for a contractor who is licensed, insured, and in good standing with your local building department. You should also ask for references and a list of satisfied customers. Thoroughly review any warranties that the contractor offers so you understand what they cover.

Some shingle manufacturers, like IKO, have developed products that can help to minimize these problems, such as the use of FastLock adhesive strips. These strips can make it easier for a roofer to seal the seams and provide additional protection from strong winds.

Underlayment

The roof underlayment is one of the most important parts of a roof. It protects the rest of your roof from water damage and offers an extra layer of protection for your house. The underlayment is not indestructible, however, and it’s important to understand what can cause it to wear out faster than expected so that you can take proactive measures to avoid damage.

The type of underlayment you choose can affect its lifespan. Some types are more durable than others, and some are more compatible with different roofing materials than others. You should also consider your climate when deciding which type of underlayment to use. For example, a metal or tile roof will need an underlayment that isn’t as vulnerable to freezing temperatures and snow and ice.

Asphalt-saturated felt underlayment has been the standard for many years because it is inexpensive, easy to install, and effective at preventing leakage. It also acts as a vapor retarder and changes its permeance depending on whether it is dry or wet. Newer, synthetic polymer underlayments are gaining popularity because they can last up to 50 years and are highly resistant to moisture penetration.

Another factor that can affect the underlayment’s lifespan is how well it’s maintained. This includes things like keeping the attic space well ventilated and performing regular roof inspections to identify potential issues before they become major problems. It’s also important to keep in mind that the underlayment can be damaged by improper installation techniques.

The underlayment should be installed by a certified roofing contractor, so you can feel confident that it’s being handled properly and will provide the level of protection you expect. Incorrectly installing the underlayment can lead to water leaks, mold colonies, and even structural problems in your home. If you’re concerned about your roof’s underlayment, contact a roofing company for more information about the best products and practices to ensure it remains in good condition. A quality underlayment can significantly increase the lifespan of your roof and help prevent costly repairs in the future. The longer your underlayment lasts, the less often you’ll need to replace it.

Flashing

Flashing is a strip of metal that lies in between areas of the roof prone to leaks, such as joints and intersections. It helps to keep water and moisture from seeping into these vulnerable areas, protecting the roofing structure and interior of the home. Flashing is usually made of durable materials that can withstand harsh weather conditions, such as metals that resist corrosion.

Depending on the situation, roofers may use either exposed or embedded flashing. Exposed flashing is typically a strip of sheet metal, while embedded flashing is a flexible rubber or plastic material. The difference is that exposed flashing is partially visible, while embedded flashing is hidden from view and used underneath shingles or tiles. It is important to have all flashing installed properly in order to prevent leaks and ensure a strong seal between the roof and the structure of the home.

Standard roof flashing is used at penetration points, such as chimneys, vent pipes, and skylights, as well as the edges of a roof. These types of flashing are often installed during new construction projects or when a roof is replaced. Flashing is also installed around the edges of walls where they meet a roof. These types of flashing may be known as counter, step, or parapet flashing.

Leaks caused by faulty flashing can have devastating effects on homes. The damage goes far beyond just the roof, affecting the interior, insulation and even the foundation of the house. When a roof has leaks, it is crucial to inspect and repair the flashing as soon as possible.

One of the main reasons that flashing fails is that it becomes damaged or deteriorates over time. This can occur for a number of reasons, including weathering and exposure to the elements, or it could be the result of a mistake during installation. The most common type of flashing is made from copper, galvanized steel or aluminum. It is often coated in a protective finish to increase its longevity and resistance to corrosion.

A common sign that flashing is deteriorating is the appearance of water spots on ceilings directly below penetration points on a roof. These spots may appear as dark stains or as cracks in the drywall. Another indication that flashing is failing is when it appears to be bent or warped.

Soffit

As the name suggests, a soffit is essentially the underside of an eave. It covers the underside of roof overhangs and conceals rafters, helping protect them from moisture and weather elements. Soffits also add an aesthetic element to a home’s exterior and can be designed to complement or contrast the color of siding.

The primary function of a soffit is to hide the structural components of a roof overhang while adding visual appeal. During routine house and roof maintenance, it is important to check for signs of damage to the soffit. If left unattended, this could lead to rot or even leaks in the house. It is recommended that a soffit be replaced immediately after any damage is noticed.

A soffit is the underside of a roof’s overhang and can be made from wood, aluminum or fiber cement. Wood and fiber cement require painting to resist rot and decay, but aluminum is virtually maintenance-free. Most homeowners choose a material that will compliment their siding and roofing for an integrated look.

It is a good idea to choose high-quality materials for your soffit and fascia, as they are both exposed to weather elements and pests such as insects, mice, squirrels, raccoons and possums. Opting for low-quality materials could lead to premature deterioration, costly repairs or even replacements in the future.

Besides protecting the rafters and other structural components of a roof, soffits also help regulate air flow in an attic space. They are often perforated or vented to allow air to circulate freely. This can help keep the attic cooler in summer, allowing you to lower your thermostat and save on energy costs. It also prevents condensation that can lead to mold and helps snow melt and drain from the roof instead of accumulating in the eaves.

A damaged or neglected soffit can create an unkempt appearance that detracts from the overall appearance of your home. Regular soffit inspection can identify minor issues that may become worse without immediate repair, and this can prevent further damage to your home and lead to costly repairs.

How to Use a Vinyl Siding Cleaner

If you’re willing to invest a little time and elbow grease, regular cleaning will keep vinyl siding looking great and reduce the likelihood of costly future replacement.

Vinyl Siding Cleaner

Certain household cleaners can be used safely on vinyl to remove tough dirt and stains including those caused by top soil, grass, oil, rust, crayon, ink and bubble gum. Avoid chlorine bleach, furniture cleaner or other harsh chemicals that could damage vinyl. Keep reading the article below to learn more about Vinyl Siding Cleaner.

Like any other exterior substrate, vinyl siding needs regular cleaning to optimize its appearance and lifespan. If you don’t clean vinyl siding regularly, it will accumulate dirt, grime, oil, jet wash deposits, pollen and organic growth, including mold, mildew and algae. These accumulations not only decrease the appearance of your home’s exterior, but can cause permanent damage to the substrate.

You can purchase cleaning solutions designed for vinyl siding, or you can make your own cleaning solution with water and a mild detergent. Regardless of what type of cleaner you use, it is important to follow the manufacturer’s instructions for the recommended dilution ratio. Also, be sure to use a soft-bristled brush or rag, especially for textured surfaces. The soft bristle will help to keep the texture’s grooves stain-free and allow you to remove small spots of mold and mildew quickly and easily.

It is also a good idea to use a soft cloth or long-handled, soft-bristled brush for cleaning the more difficult to reach areas of your vinyl siding. This will prevent you from causing any scratches or other types of damage to the vinyl. A garden hose with a spray nozzle is usually sufficient for rinsing off the cleaning solution, but for stubborn dirt or debris, you may want to use a pressure washer at a low setting so that you do not damage the vinyl.

Whether you are using a spray or a soft-bristled brush, be sure to start at the bottom of your house and work your way up. This will prevent streaking and ensure that you rinse away the soap completely before it dries. Also, if your home has brick facing, it is a good idea to cover this with a tarp so that the runoff from the cleaning solution does not discolor it.

Keeping your vinyl siding in pristine condition requires some effort, but the results are well worth it. If you are careful to avoid common mistakes, your cleaning efforts will be successful and your siding will remain in great shape. For more information on how to properly clean your vinyl siding, please check out our blog post: Cleaning Tips for Your Vinyl Siding.

General Household Cleaners

There are a number of cleaning solutions designed specifically for vinyl siding. Some are more effective than others at eliminating stains and grime, but all of them can help to clean a vinyl exterior and keep it looking its best. Often, these cleaners are made from natural ingredients that are less harmful than store-bought cleaning products. They are also more affordable and environmentally friendly. Additionally, many of them can be customized for specific cleaning needs or challenges. For example, a mixture of water and white vinegar can remove light mold and mildew spots, while a solution containing oxygen bleach can eradicate more severe stains from dirt build-up and greasy residue.

It is important to remember that when using any kind of chemical-based cleaner, you must take proper precautions. This may include wearing rubber gloves and safety glasses, as well as securing your ladder and covering any plants or items that could be affected by the cleaning solution. It is also a good idea to rinse the siding thoroughly after applying any cleaner.

In addition to the cleaners that are specifically formulated for vinyl siding, you can use general household cleaners like Fantastik, Murphy’s Oil Soap or Windex to clean mildew, mold and dirt. If your siding has a lot of rust stains, you will need to use a cleaner that is designed to eliminate rust from metal and stone.

Using a long handled brush, dip the brush into your chosen cleaning solution and begin to scrub the surface of the vinyl. You can scrub individual planks or entire sections of the exterior depending on how dirty it is and how much grit is stuck in it. Be sure to re-dip your brush as needed. After you are finished scrubbing, rinse the vinyl with your garden hose, being careful to avoid pointing the spray nozzle directly at the vinyl. This can cause the soapy solution to seep behind the vinyl and cause damage.

If you are unable to get your vinyl exterior completely clean using these DIY methods, hiring a professional power washing service can be an option. A professional can help ensure that the cleaning process is safe and effective, as well as provide you with tips to keep your vinyl clean for the future.

Bleach

Using an ordinary bleach solution, you can effectively kill mold and mildew clinging to vinyl siding. However, a strong concentration of bleach can damage or discolor plants in the yard, and it isn’t safe to use around pets and children. Be sure to water the bleach down to a safe concentration before applying it to your home, and avoid leaving the solution on for more than 24 hours. Alternatively, you can try other EPA-registered disinfectants designed for outdoor use.

Depending on your climate, mildew and mold can quickly grow on dirty vinyl siding. Regular cleanings can help keep them at bay, but if yours is a heavily soiled house or you’ve gone too long between washings, green crud will soon take over and leave your siding looking unappetizing. You can wash your own vinyl siding by hand or use a garden hose attachment with a soft-bristled brush and a bucket of cleaning solution. For a little extra oomph, you can also use a pressure washer.

General household cleaners like Lysol or other brand-name versions are effective vinyl siding cleaners. They can remove tough stains caused by gum, crayon, ink, oil, grease, or even rust from vinyl siding. However, you should avoid cleaners that contain undiluted chlorine bleach or furniture polish and cleaner.

Aside from the grime gathered by dirt and pollen, other pollutants can degrade vinyl siding over time. The most common are algae build-up and a neon green crud that is actually toxic black streaks of organic growth. Regularly washing your vinyl siding helps prevent these streaks from getting worse, but if they do, a local pressure-washing service can offer non-bleach options that are still powerful enough to kill the streaks.

Choosing the right cleaning products for your vinyl siding can be challenging, especially if you’re not familiar with your home’s exterior materials. It’s best to consult a local cleaning professional and ask about their recommendations for the most effective and safe cleaning solutions. Then, you’ll have the peace of mind that comes from knowing you’ve maintained the beauty and value of your home with a quality cleaning job.

Vinegar

The non-toxic vinegar makes an excellent cleaning solution for vinyl siding. Its natural antifungal properties can help diminish mildew stains and it can also remove oil-based stains from the surface of vinyl. You can create a vinegar solution by combining 70 percent white vinegar with 30 percent water, or you can use one gallon of water mixed with a cup of oxygen bleach (this is effective for removing light mold stains and poses no threat to surrounding plants).

Vinegar may be the best option for cleaning vinyl siding if you’re worried about the risk of abrasion and damage from harsh cleaners. It’s also a good choice for removing oily dirt and grease build-up, since it’s effective against a wide variety of stains, including crayon, ink, and bubble gum. It’s best to spray the cleaning solution onto a section of the vinyl, and then scrub it with a soft-bristled brush or sponge. Afterward, rinse the surface of the vinyl and loosened debris thoroughly with a garden hose.

Another great way to clean vinyl siding is by using a pressure washer. This method is effective, but you’ll have to be careful not to overdo it and cause damage. For instance, you’ll want to be cautious about pointing the stream of water directly at areas where there are plumbing connections and windows. Additionally, you’ll want to be sure that your cleaning solution is safe for vinyl – avoid anything with organic solvents, liquid grease remover, undiluted chlorine, or similar chemicals.

In addition to being safer for your home and the environment, it’s also much cheaper to use cleaning solutions made from household ingredients than it is to purchase commercial cleaners or a power washer. In fact, a soft-bristled brush and ordinary soap can do a great job of removing dirt from vinyl siding, and you can save even more money by using your garden hose with a sprayer attachment for your cleaning solution. This allows you to reach hard-to-reach corners and crevices, where dirt tends to accumulate. A hose also makes it easier to quickly rinse away detergent residue before it has a chance to stain or weaken the vinyl.

Navigation